

The Whisper is stuffed with brutal leaping puzzles which are far tougher than any battle within the mission. When you’re misplaced or simply plain caught, right here’s tips on how to beat each Soar Puzzle in The Whisper Unique Quest in Future 2.
Future 2: The Whisper Unique Quest full puzzle walkthrough
On this information, I’ll clarify each space you’ll possible get caught in throughout The Whisper Unique Quest. If leap puzzles aren’t your robust swimsuit, I like to recommend equipping the Strand Subclass and Grapple Grenades, as they’re very good mobility instruments. I additionally extremely suggest tackling the search on the Regular problem first, because it offers you a 40-minute timer as an alternative of 20.
First Puzzle
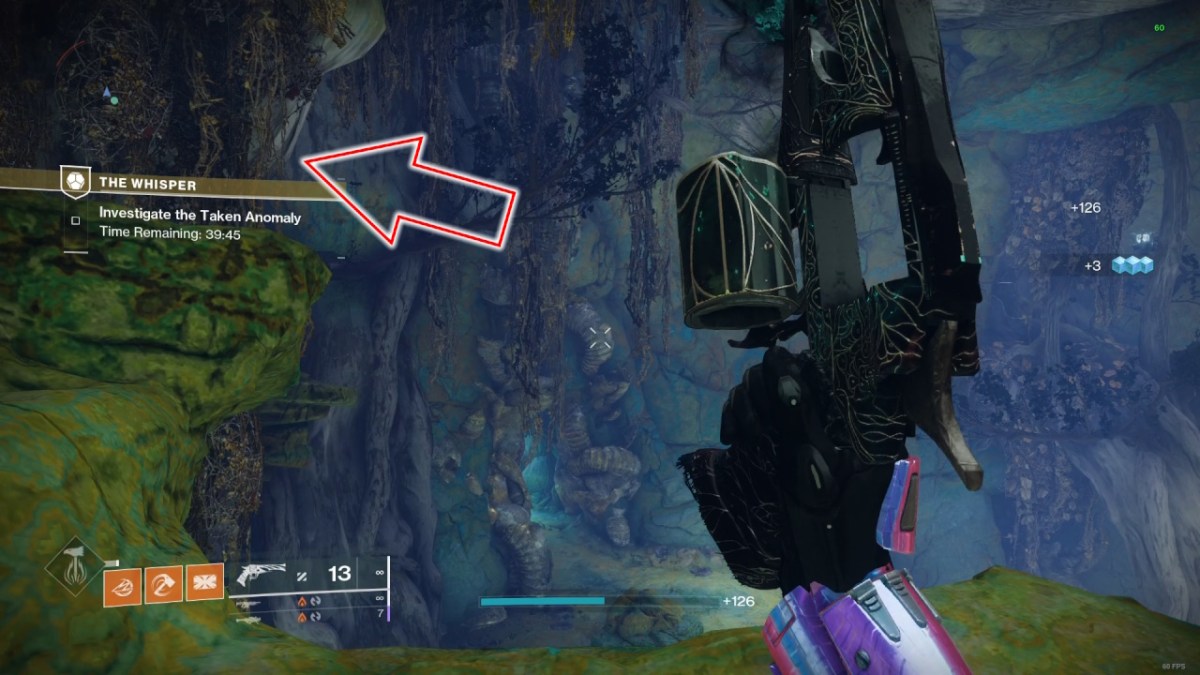
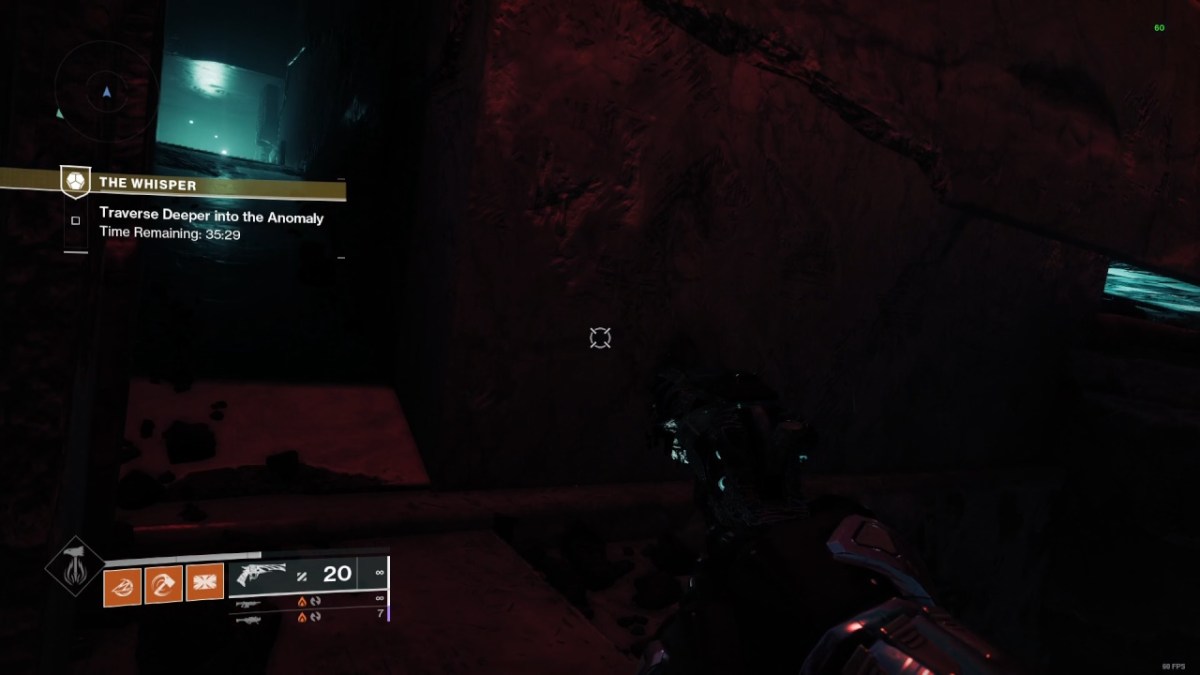
The Whisper throws a curveball proper at first of the mission. After you’ve defeated the primary group of enemies, you’ll be on a touchdown above an enormous room. You may ignore the room solely and head to the place the arrow factors within the image above. There’s a Taken Centurion up there who offers a useful marker for the ledge. Destroy the Taken Blight behind the Centurion and fall down the outlet to proceed the search.
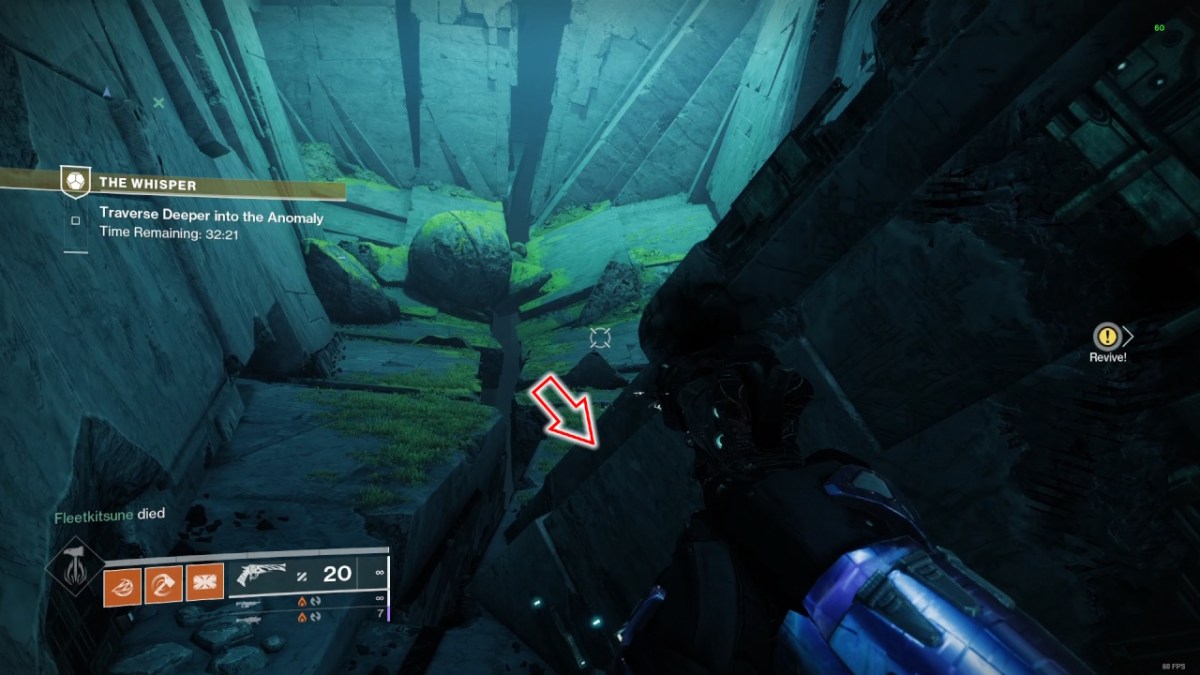
You Are Alone
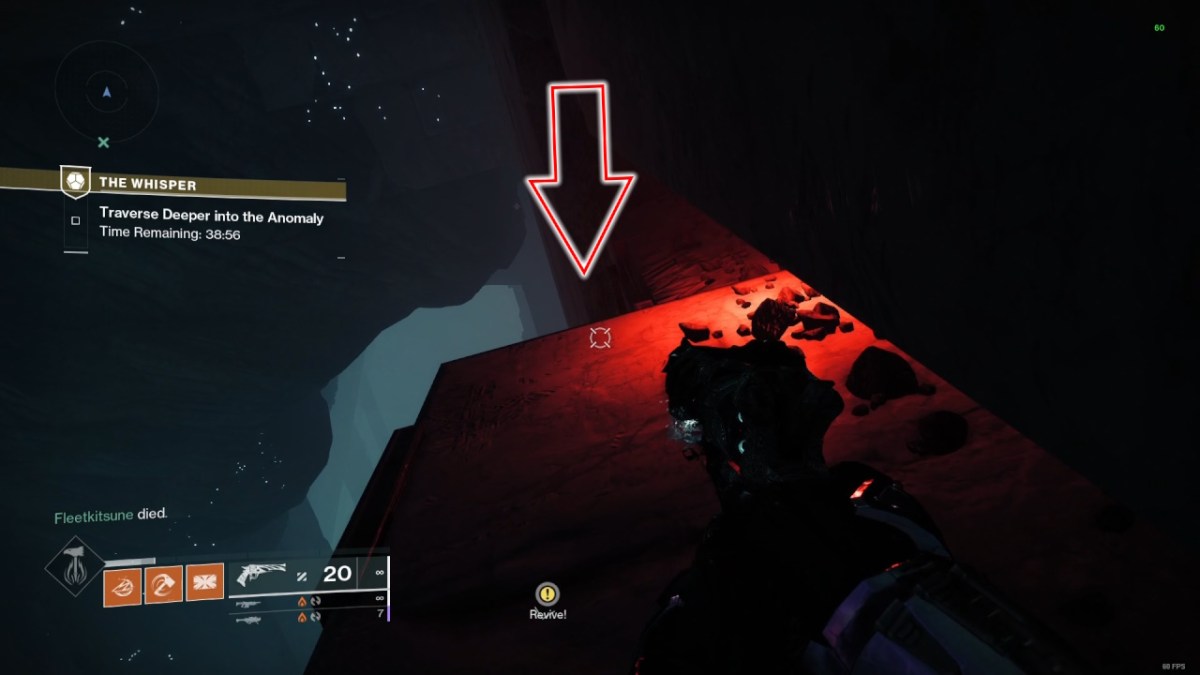
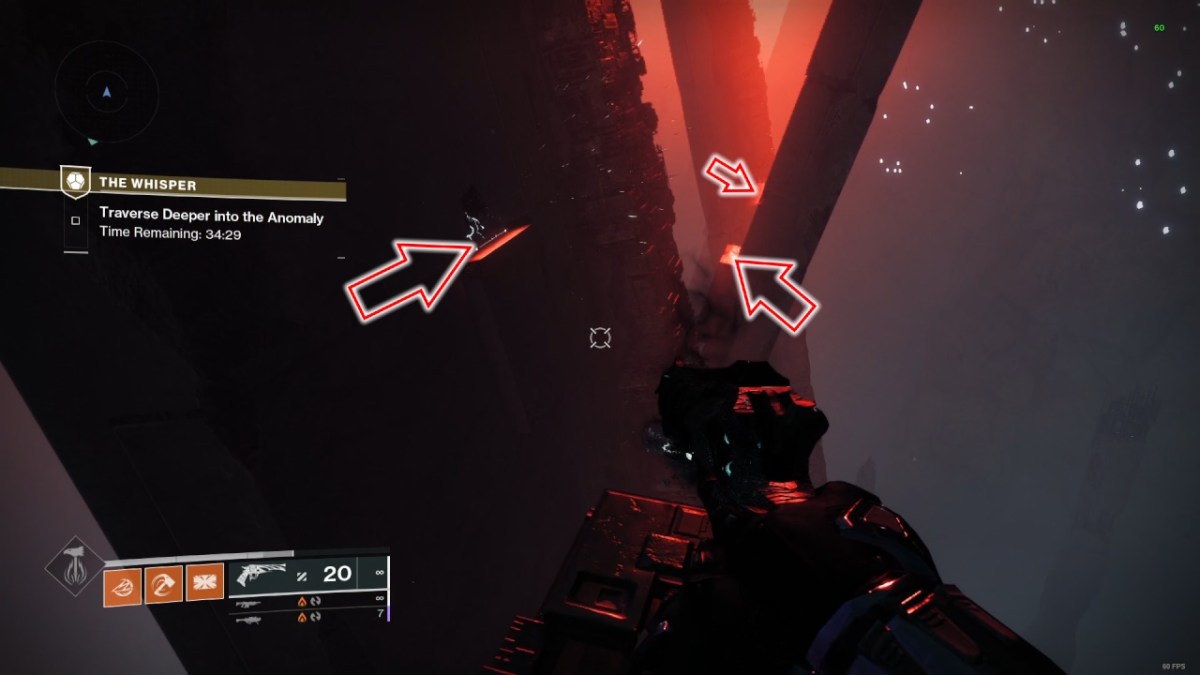
There are a number of nasty jumps after the voice says, “You Are Alone.” Drop down while you attain the ledge (pictured above) and land on the slender path beneath.
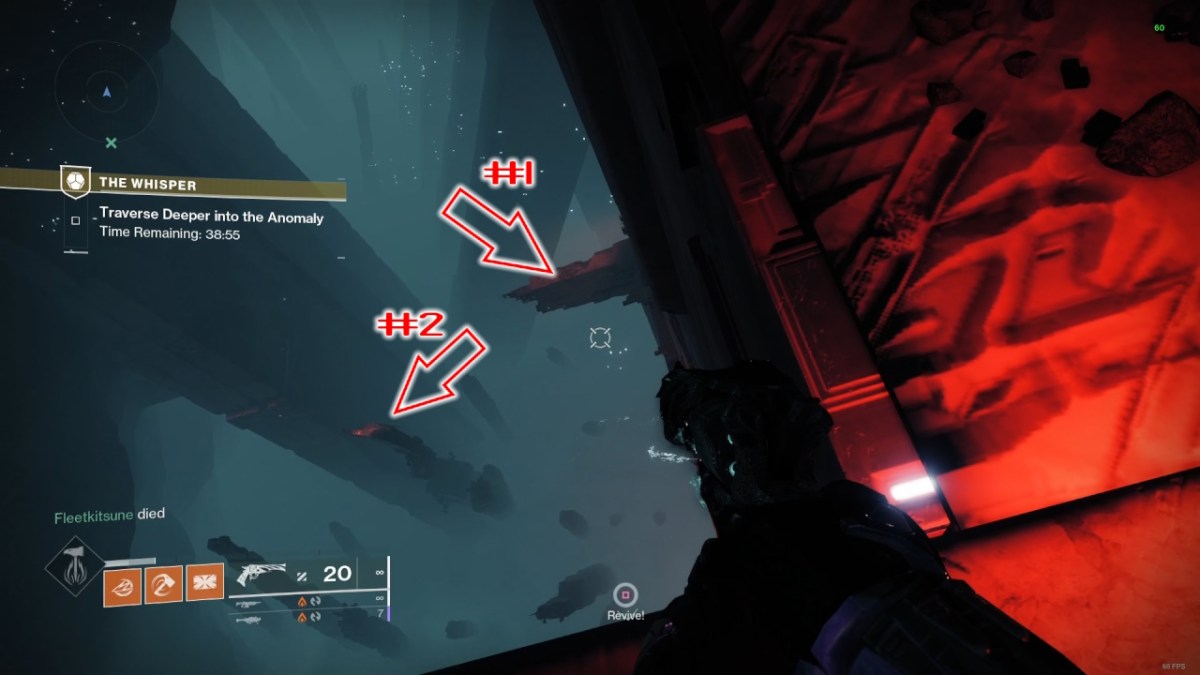
Fastidiously stroll alongside the trail, avoiding the hazards. You need to leap to the platforms I’ve labeled within the picture above.
It’s very simple to get misplaced right here. Soar to the sting in entrance, then go left as an alternative of proper. Oddly sufficient, you may journey fairly far to the suitable earlier than hitting an invisible barrier, which wastes a number of time.
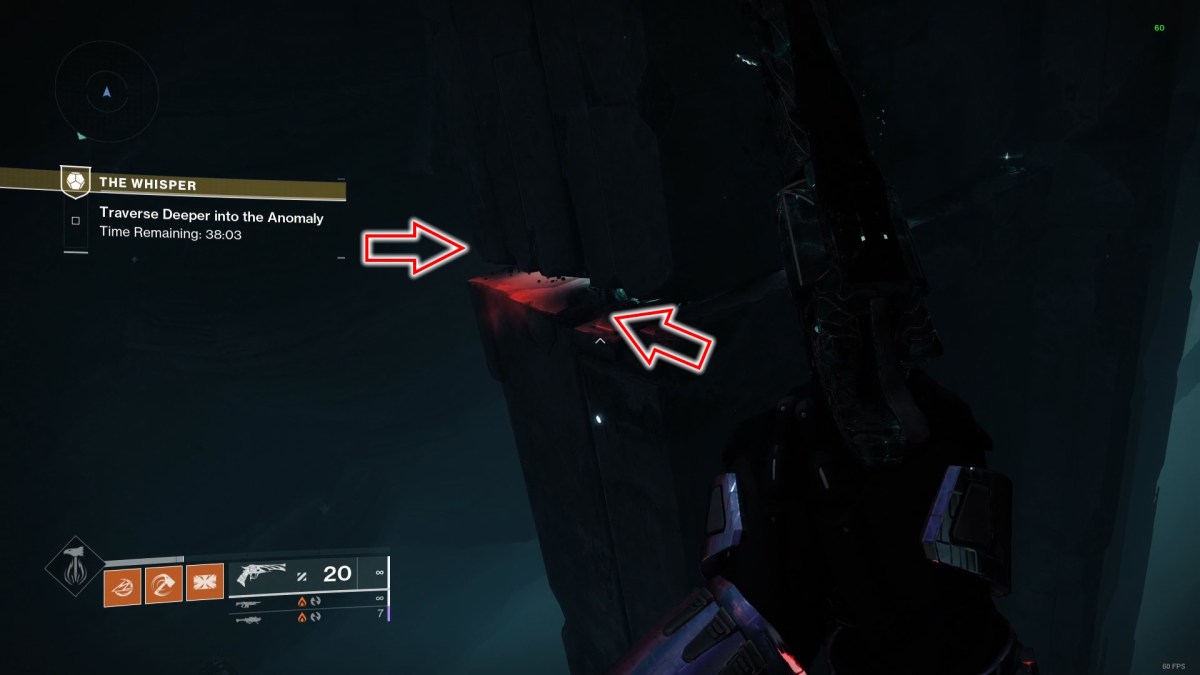
Once you go left so far as you may, you need to carry out a blind leap across the nook. Don’t fear if this takes a few tries, because the respawns are beneficiant on this space. Thoughts the hazards and leap throughout the chasm to your left while you attain the top of the trail.
Observe the route and take the transferring platform up. You need to enter the doorway within the image above. It’s tucked away into the wall, and I missed it on my first go as I used to be trying straight forward.
There’s a difficult part of jumps up forward, though they’re simple to identify. When you mess up the timing, you’ll be launched off the platforms, however the route is simple.
Once you attain the lifeless finish, you may escape the world by the small doorway within the image above. This entrance robotically opens and closes, so you need to time your leap to get inside.
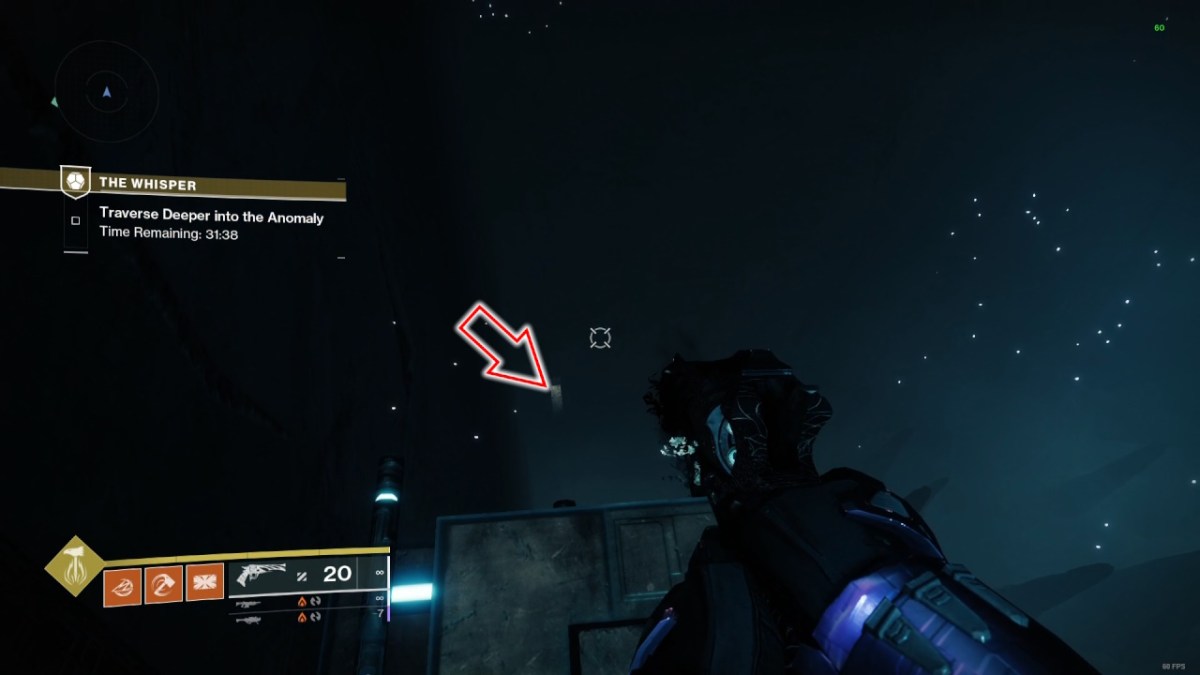
You Shall Drift
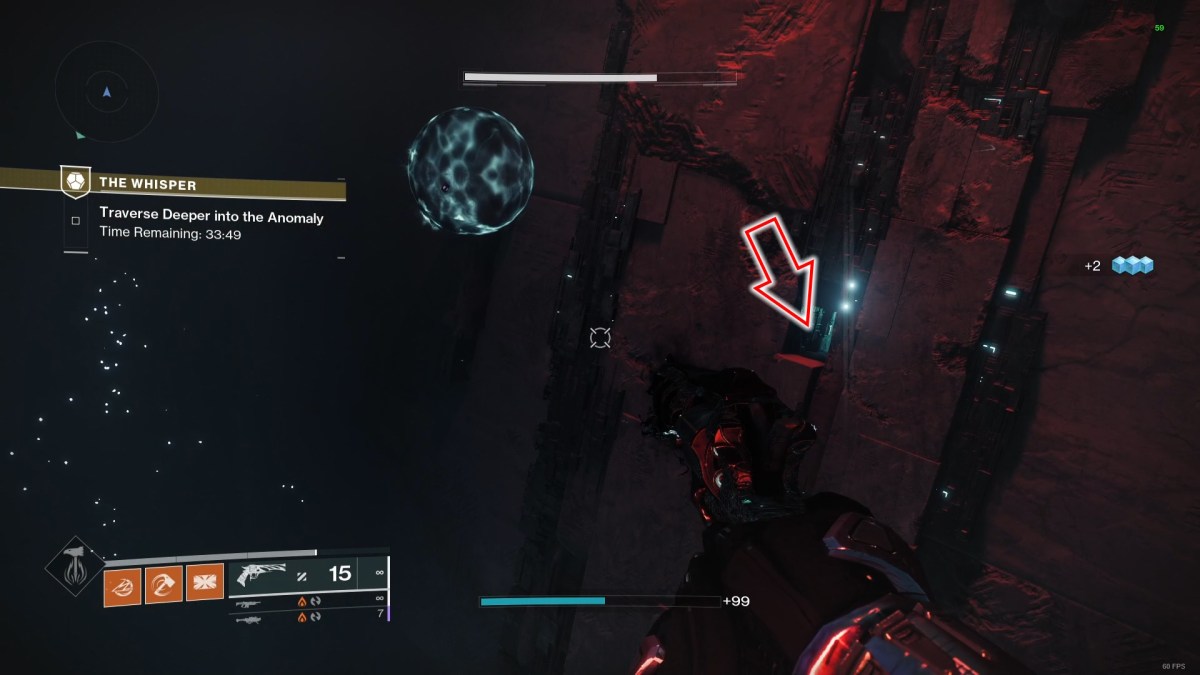
I ran the timer out on my first go to right here, as there was a gap within the wall to the left I used to be satisfied I might attain. Fortuitously, the answer is way simpler. There are a number of portals on both sides of the room. To flee, enter the high portal in the back of the room on the suitable.
This isn’t a leap puzzle, however getting misplaced right here could be very simple. When you’ve gone by the portal, you’ll attain an expansive room (pictured above). The exit is thru a small opening across the nook to your proper at floor degree.
You shall drown within the deep
Observe the skinny ledge to the left till you attain the sting pictured above. Then, you must make a really exact leap to the doorway beneath, which is simpler stated than performed. There’s additionally a small ‘lip’ simply above the doorway, so you may’t skate down the wall above.
Don’t fear if this leap takes a couple of makes an attempt, as you’ll respawn close by. When you’re a Titan, keep in mind to make use of your thrusters a couple of seconds earlier than you land, as it should take a short second to decelerate. Additionally, the platform is kind of slender, and it’s attainable to push your teammates off when you land on them, so go single-file when you’re in a Fireteam.

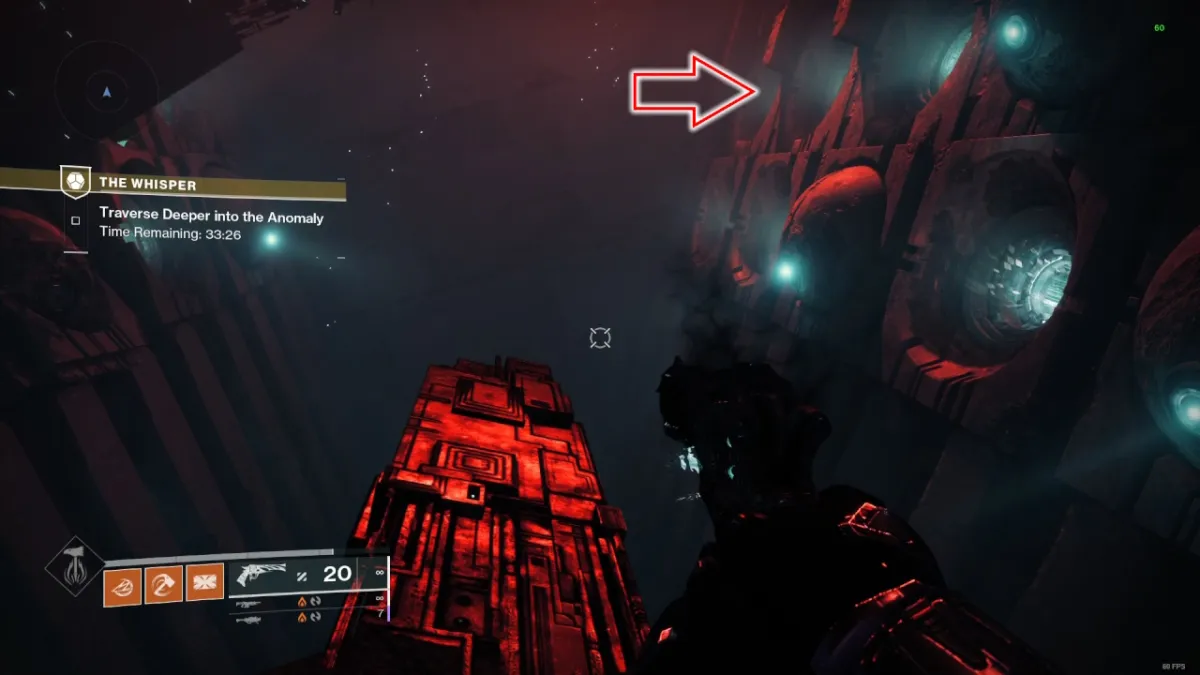
The next part incorporates some claustrophobic jumps, however observe the slender ledge on the left and look upwards to the suitable. You’ll see a small purple entrance (pictured above). Fastidiously leap inside and head towards the primary combat-centric a part of the mission.
beat the Taken within the Whisper Unique Quest
When you’ve made it this far, you’ve already overwhelmed essentially the most demanding a part of the search. There are a number of rooms filled with Taken enemies, and you need to defeat all of them to progress. The door to the next room is blocked till each enemy is defeated. Do not forget that you need to shoot the blight on every doorway to open it, but it surely’s invincible when you even depart a single enemy standing.
I used a Polaris Lance Scout Rifle for this half, as there are lots of ranged enemies, however you should utilize no matter you want. Be happy to spend your Tremendous to hurry up clearing enemies, as it should refill by the point you attain the bosses.
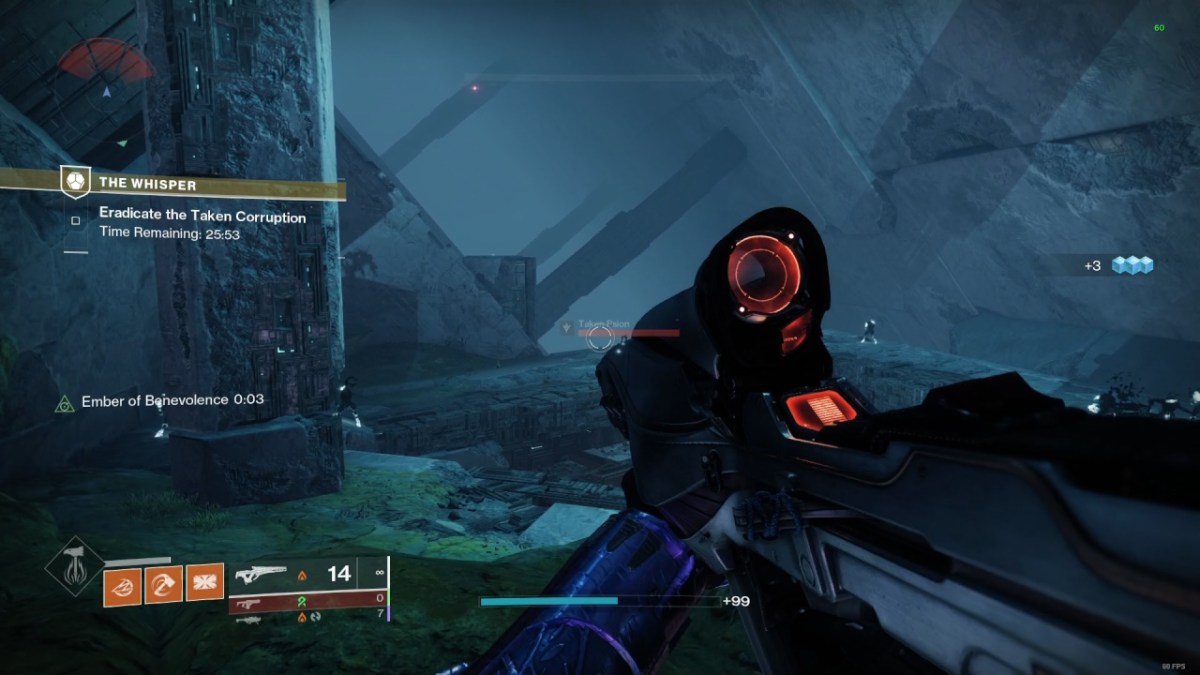
Once you open the third door, two Taken Centurions will spawn behind you. Defeat them, then kill each Taken enemy within the wide-open area (pictured above). There’s a big triangular gap in the midst of the room with a taken blight masking it. Just like the doorways from earlier, you may destroy this with gunfire after beating each enemy. Simply watch out for the snipers on the ledges above, as they’re simple to overlook.
Soar down the outlet, and also you’ll attain the ultimate area of The Whisper unique quest. You’ll must battle by two encounters: one in opposition to a trio of Taken commanders and the opposite in opposition to Tulgohr, Side of Agony.
Time is at all times an element on this quest, however I beat each bosses as a duo in just below 8 minutes. When you solely have a couple of minutes to spare earlier than the encounter, it might be value restarting the mission, as you’ll get right here a lot quicker in your second try.
The Whisper Unique quest is a incredible addition to Future 2, however be sure that to take a look at the Onslaught mode for a ton of distinctive rewards.